Automatic email forwarding in Gmail is one of those features that sounds technical until you actually sit down and do it. Once it is set up, every new message landing in one inbox gets quietly copied and sent to another address of your choosing, which is useful for consolidating multiple inboxes, handing customer queries to a business partner, or simply keeping a backup copy of incoming mail in a separate account.
Before getting into the steps, there is one important constraint to flag upfront. This entire setup process must be done from a desktop or laptop computer browser. The Gmail mobile app on iPhone and Android does not expose the backend routing tools needed to configure forwarding. Open a browser, log into Gmail on a computer, and work through the steps from there.
Step One: Register and Verify the Destination Address
Gmail does not allow mail redirection to an unverified address. Before any forwarding can be activated, you need to prove that you own or have permission to access the inbox you want to forward mail to. This is a security measure that prevents anyone from silently copying your email data to an address you did not approve.
Here is how to complete the verification:
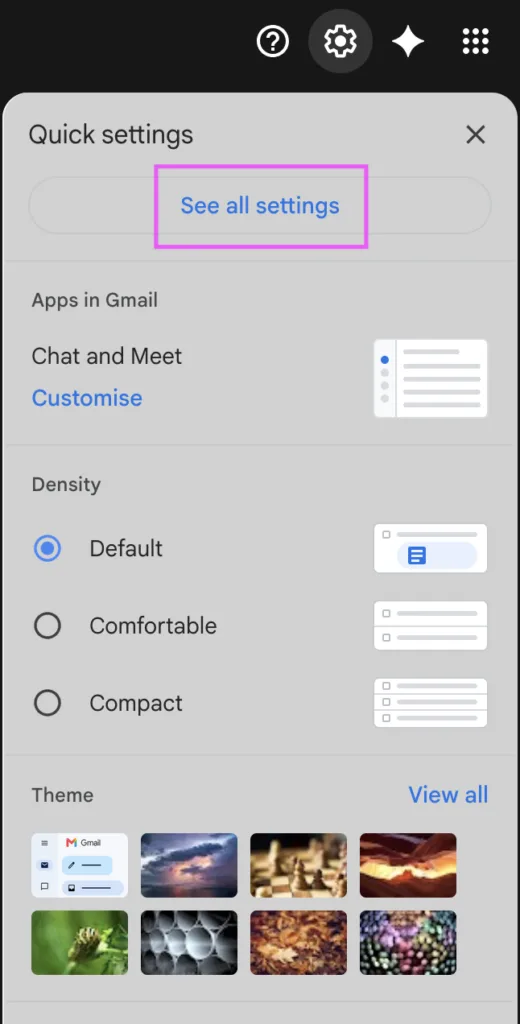
- Log into your Gmail account on a desktop browser. Click the ‘Gear icon’ in the top right corner of the screen, then select ‘See all settings’ from the dropdown menu.
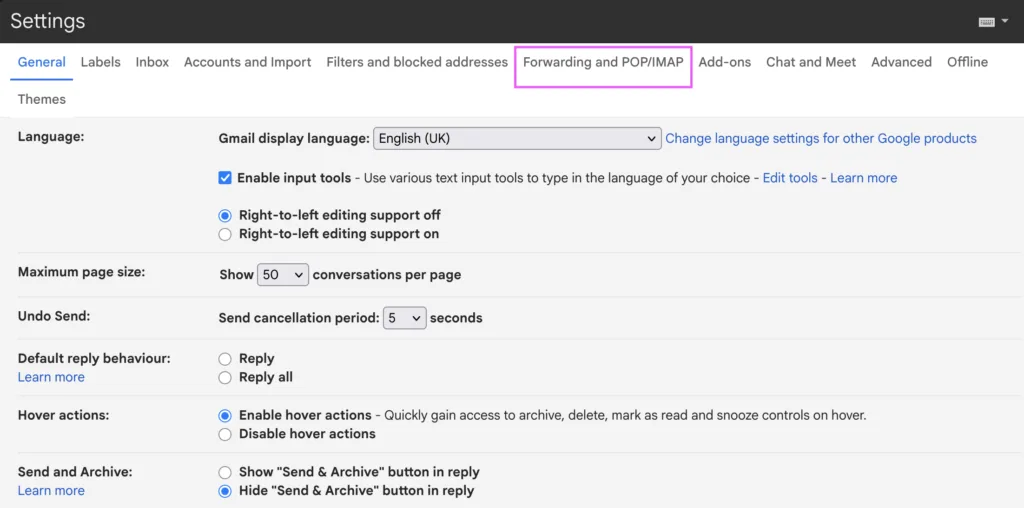
- Click the ‘Forwarding and POP/IMAP’ tab at the top of the settings page. Locate the Forwarding section and click the ‘Add a forwarding address’ button.
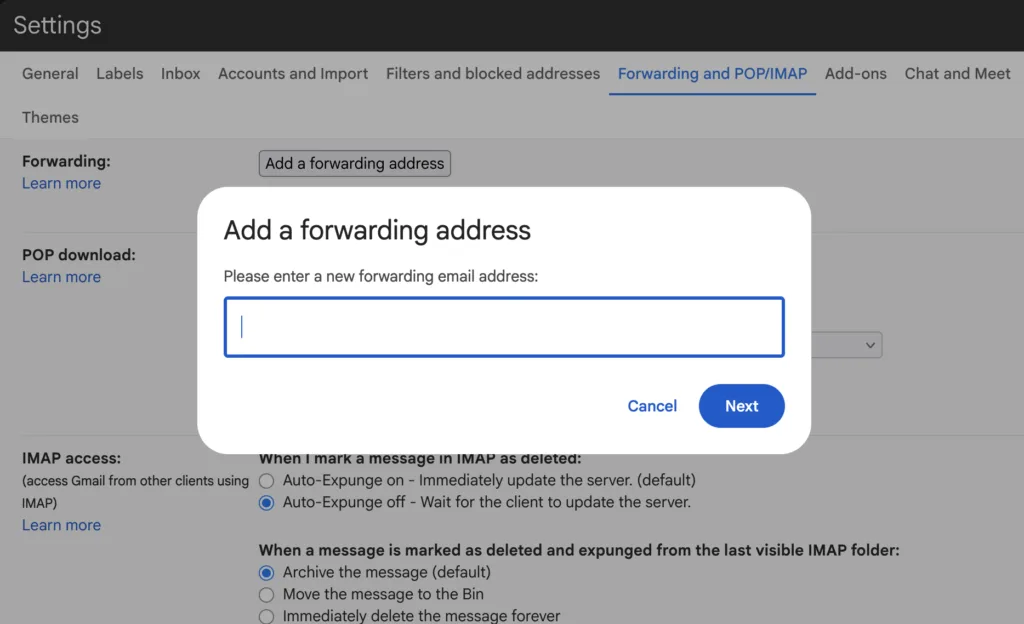
- Type the full destination email address into the popup box. Click Next, then Proceed, then OK. Google will immediately send a verification email to that destination address.
- Open the destination inbox, either in a separate browser tab or on a different device. Find the system email from Google and click the verification link inside it to confirm the connection between both accounts.
- That verification link is time-sensitive, so complete this step promptly after submitting the address.
Step Two: Turn On the Forwarding Rule
Once the destination address is verified, return to your primary Gmail account to activate the actual forwarding rule.
- Go back to your primary Gmail settings page and refresh the browser tab.
- Open the ‘Forwarding and POP/IMAP’ tab again.
- In the Forwarding section, click the radio button next to ‘Forward a copy of incoming mail to’.
- Select your newly verified email address from the dropdown list.
- Choose how Gmail handles the original message in your primary inbox. The safest option is ‘Keep Gmail’s copy in the Inbox’, which maintains a local backup of every forwarded message.
- Scroll to the bottom of the page and click ‘Save Changes’.
Once this is saved, a pink banner will appear at the top of your Gmail inbox. This is a built-in Google security alert notifying you that automatic forwarding is now active on the account. It stays visible for the first week after activation.
Step Three: Forward Only Specific Emails
Forwarding your entire inbox to another address works well in some situations, but it can create noise and clutter if only certain types of messages actually need to be redirected. Gmail’s built-in filter system lets you route specific emails, such as bank alerts, client inquiries, or invoices, while leaving everything else in place.
Here is how to set that up:
First, turn off global forwarding: Go back to the Forwarding and POP/IMAP tab, select Disable forwarding, and click Save Changes. This stops your entire inbox from being redirected before you build the more targeted filter.
Build your search filter: Click the ‘Show search options’ icon inside the main Gmail search bar at the top of the screen. This opens an advanced search panel where you can define your parameters, such as emails arriving from a specific sender or containing specific words or phrases.

Link the forwarding action: Click Create filter at the bottom of the search panel. On the next screen, check the box for Forward it and select your verified destination address from the list. Click Create filter to complete the setup.
From that point forward, only messages matching your defined filter will be forwarded. Everything else stays in the primary inbox untouched.
Important Rules to Keep in Mind
Spam stays put: Gmail processes all incoming mail through its spam detection system before applying any forwarding rules. If an email is classified as spam, it goes to the junk folder in the original account and will not be forwarded to the destination address. Forwarding rules only apply to messages that pass spam filtering.
Old emails are not affected: Forwarding only applies to new messages arriving after the setup is completed. Emails already sitting in your archive or inbox before the rule was activated will not be pushed to the destination address retroactively.
One destination address at a time: Gmail allows global inbox forwarding to a single address only. If you need incoming mail distributed to more than one person or inbox, the filter method is the way to handle that. Build separate filters for different types of messages and route each one to its own verified destination address independently.
Setting up Gmail forwarding takes less than ten minutes from start to finish once you are working from a desktop browser. The verification step adds a small waiting period while the confirmation email arrives, but after that the process is entirely straightforward. For anyone consolidating personal and work inboxes or routing client messages to a team member, the forwarding system works reliably in the background once it is configured.