The desktop scanner has become one of the least necessary pieces of office equipment most people still own. Both iPhone and Android devices now carry advanced document scanning tools built directly into their operating systems, and the output quality is good enough for contracts, receipts, forms, and official paperwork. The camera detects borders automatically, corrects skewing, removes shadows, and converts the page into a clean PDF, all without opening a third-party app.
This guide covers exactly how to scan a document on both iPhone and Android using only the tools already installed on your device.
How to Scan a Document on an iPhone
Apple provides two native scanning methods on iPhone: the Notes app and the Files app. Both use the same underlying scanning engine, so the output quality is identical. The difference is purely about where you want the finished document to live.
Method 1: Scan Using the Notes App
The Notes app is the better option when you want to store written context, annotations, or additional text alongside your scanned document in the same place.
- Open the Notes app and either open an existing note or create a new one.
- Tap the Camera icon or the Attachment plus icon located directly above the keyboard.
- Select Scan Documents from the popup menu that appears.
- Position your phone over the document. In Auto mode, the viewfinder highlights the page in yellow, detects the corners automatically, and captures the image without any input from you.
- If the phone does not snap automatically, press the Shutter button or either Volume button to capture manually. You can then drag the round corner circles to align them precisely with the edges of the paper.
- Tap Keep Scan if you captured manually, then repeat the process for any additional pages.
- Tap Save in the bottom right corner when all pages are complete.


Method 2: Scan Using the Files App
The Files app is the more direct route when you want the finished document saved straight into iCloud Drive or local phone storage without it sitting inside a note.
- Open the Files app.
- Tap the three dots (the More button) in the top right corner of the screen.
- Select Scan Documents.
- Line up the page in the viewfinder and allow it to capture automatically, or press the shutter button to capture manually.
- Adjust the border handles if prompted, then confirm.
- Choose your destination folder and rename the file before saving.
How to Scan a Document on an Android Phone
The default high-quality scanning method for Android is built into Google Drive and Files by Google. Google has rolled out a significant document scanner redesign that introduces fast on-device processing, and the results hold up well against dedicated scanning applications.
Scanning With Google Drive or Files by Google
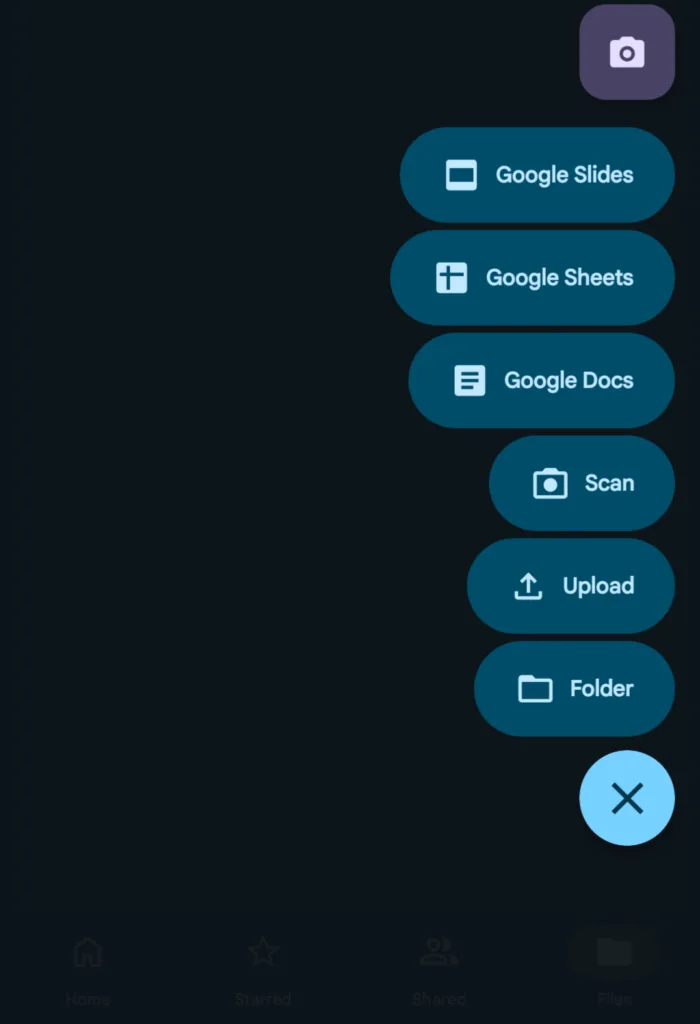
- Open the Google Drive app or the Files by Google app.
- Tap the Plus (+) button or the Camera floating action icon in the bottom right corner of the screen.
- Select Scan, or Clean Up/Scan depending on the interface skin on your specific device.
- Hover the camera over the document. The viewfinder automatically identifies and highlights the document edges in real time.
- Smart Batch Scanning: On Android phones running 8GB of RAM or more, you can hover over multiple pages sequentially or lay several receipts flat next to each other. The scanner automatically splits them into separate pages or individual documents without requiring you to tap between each one. It also filters out accidental duplicate captures.
- A preview thumbnail appears at the bottom of the screen once a page is captured. Tap it to crop, rotate, or use the cleanup tool to digitally erase unwanted marks or smudges on the page.
- Tap Save or Upload. From here you can rename the file, select between PDF and JPEG format, and choose the exact Google Drive folder where the document will be stored.

The quality of a phone scan comes down largely to the physical setup before you press anything.
Place the document on a high-contrast background. A white sheet of paper scans cleanest against a dark surface, such as a dark wood table or a black folder. Hold the phone completely flat and parallel to the paper to reduce perspective distortion. Natural light produces the cleanest result. Overhead hand shadows from artificial lighting are one of the most common causes of uneven scan quality, and positioning the document near a window removes that problem almost entirely.
iPhone vs Android: Which Scanner Is Better?
Both platforms produce clean, usable PDFs for everyday document needs. The choice between them comes down to where you already store your files.
iPhone users who live inside the Apple ecosystem will find the Notes and Files integration seamless. Documents flow directly into iCloud without extra steps, and the scanning engine is fast and accurate.
Android users on Google Drive benefit from the Smart Batch Scanning feature, which is an advantage for anyone who regularly scans multiple pages or receipts in a single session. The cleanup tool for removing smudges and marks is also a practical addition that the iPhone native scanner does not offer in the same way.
For single-page documents, both platforms are equally capable. For multi-page batches or documents with physical imperfections, the Android Google Drive scanner offers a slightly more flexible editing workflow.
You Do Not Need a Third-Party App
There is no need to download a third-party scanning app for standard document work. Applications like Adobe Scan and CamScanner offer extended features for specific professional workflows, but for contracts, invoices, receipts, ID documents, and general paperwork, the native tools on both iPhone and Android produce output that is clean, correctly formatted, and ready to share or store.
The built-in scanners also carry an advantage that third-party apps do not: your documents stay within the ecosystem you already use, processed on-device, and saved directly into the storage location of your choice without passing through an additional application’s servers.
Phone scanning is not a workaround. It is the standard for everyday document management, and both Apple and Google have built tools that are good enough to retire the desktop scanner for most users entirely.